How to make a chalkboard fairy wand
Last saturday I did a demo at the store all about kids party activities. I had so much fun will all those activities I desided to make up a few tutorial posts for kids party ideas.
please excuse the quality of the photos as I did them while I was demonstrating in the store.
Here is the first…
How to make a chalkboard fairy wand
quick and easy project to do with the kids or before the party so they are ready to be played with. 🙂
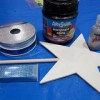
You will need:
Woodern wand
Blackboard/chalkboard paint
glitter glue
loose glitter
Step 1: Paint the wand with the blackboard paint.
Try to make it as smooth as possible. The one I used settled pretty well and you couldn’t even see any brush strokes! I don’t know if they will all dry as flat though so just try to make it as sooth as you can because if there is brush strokes when you use the chalk over the top it will make the strokes really obvious.
Make sure you don’t forget the sides!
And the back!
if you like give it a second coat.
Step 2: Apply the glitter glue
I have put the glitter glue around the edge of the wand. You can of course decorate it however you want but try to keep the decos to the edge of the wand to give you (or the kids) the maximum amount of area possible to use the want as a chalkboard.
All glittered! Now you can leave the glitter like this but to me it still looks a bit flat so…
Step 3: Sprinkle glitter over the glitter glue
I have used a beautiful blue holographic glitter powder. The finer the glitter the better when it comes to this kind of work.
F.A.Q. Why use glitter glue and not just glue?
I find glitter glue is a lot easier to use for this kind of thing as it pretty much stays there you put it. Some glues when they dry spread a lot more and quite unevenly. Because glitter glue is make as a finishing element it is designed to sit where you put it.
Step 4: Shake off the excess glitter.
I suggest you use a glitter tray or if you don’t have one a piece of paper with folded edges works perfectly! If you fold up the edges it stops the glitter from just going everywhere. You can kind of see how my paper is folded. It also means you can easily fold the paper to a point to get the excess glitter back into the container. I will do a post about how to make a paper glitter tray later on so stay tuned for that if you are not sure what I mean.
You can also use a DRY paint brush to get some other excess glitter off that wont come of just by shaking it. Just be careful not to bump the wet glue.
Step 5: Cut a few strands of ribbon
They can be as long as you like! Measure the ribbon against the stem of the wand to see how long you want yours to be.
Step 6: Tie the ribbon.
Make sure it is nice and tight. If you think it will come off just add a bit of glue.
All done! 🙂
See how much prettier the glitter is now! 🙂
If its a boys party or you just want something more simple you can just paint it with the blackboard paint and off you go. So much fun! 🙂




-1 Comment-
I LOVE THIS!! Such a cute idea! 🙂