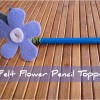
How to: Felt flower pencil topper
I must apologise for the picture quality again with this one. I was took these pics while I was doing a live demo too. Fluorescent lighting and a happy snap camera doesn’t turn out award winning photos. 😛
You will need:
Felt
Wire
Pencil
Scissors
Step 1: Cut out your flower
I wanted my flower to be kinda funky looking so I cut mine to have all different size petals.
Step 2: Cut out some leaves
You can of course make your leave whatever size and shape you like. I cut mine free hand becuase I wanted then to be uneven like the flower. 🙂 If you want a more structured shape to your flower or your leaves draw own the shape you want first and use it as a template.
Step 3: Cut out a circle for the middle.
Step 4: Poke the wire through the shapes
The sharper the wire the better. As you can see the wire I used is quite flat at the end and made it hard to poke through the this weave of the felt. I suggest if you can’t get a sharper tip to your wire that you attempt to poke a hole through the shapes first. It will make it much easier to thread the shapes on then.
Put the shapes on bottom to top.
So the shape you want on top (the circle) needs to go on last. You will see why in the next step.
Step 5: Thread the wire back through again.
The wire going back through each of the shapes secures them and holds them in place.
When you have the wire all the way through make sure you have one long piece and one short piece of wire showing through the back of the flower.
Step 6: Wrap the excess wire
You don’t want your pieces to fall off so you need to make sure you wrap the small end of the wire around the longer end of the wire. Get this as close to the flower as you can.
Step 7: Wrap it on the pencil
Now take the longer end of the wire that is left still poking out of the flower and wrap it around the top of your pencil.
All done!


-2 Comments-
Hello Dom 🙂
I've just finished my first craft following this tutorial. My daughther is so happy that she is singing 🙂
I will be posting it on my blog (http://coelhinhoseternuras.blogspot.com/) in a couple of days.
Thank you so mutch for sharing with us your talent and the beautiful things you do.
SóniAS – Portugal
Aww thank you so much sonias!! You have made my day! 🙂