How to: Earring hanger
This is one super easy tutorial that wont cost you much at all!
Most of the things you need to make this project you will most likely have lying around the house.
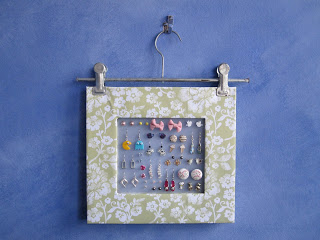
I wanted an earring holder but I didn’t have any space to put one on a surface…
so I made one I can hang in my cupboard. 

You will need:
A coat hanger (one with clips)
Cardboard
Wrapping paper
Perforated plastic sheet
Glue
Scissors
Double sided tape
Step 1
Cut two frame shapes out of cardboard
any old cardboard box should give you all you need. 

Step 2
Cut a piece of wrapping paper about a inch larger than the frame the whole way round. You need this excess to wrap around the cardboard.
Step 3
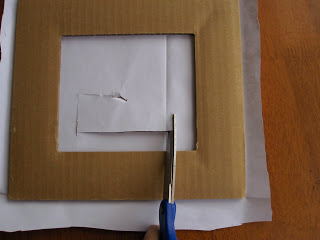
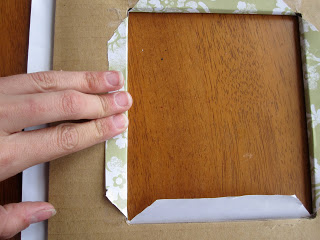
Cut a square out of the center of the wrapping paper, again you need to leave enough paper around the frame for wrapping.
Cut lines from the corner of the inside square to the corner of the frame.
Step 4
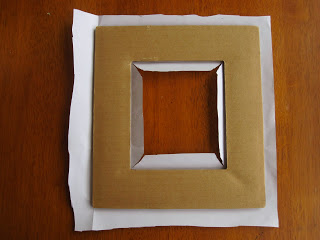
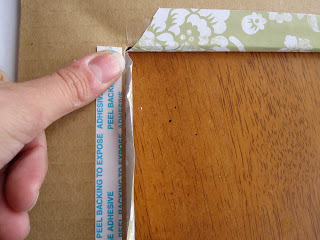
Use double sided tape to stick the paper to the frame.
You can use glue for this if you prefer… I think double sided tape is a lot faster and less messy than using glue but if you are more comfortable with glue thats a-ok. 

Step 5
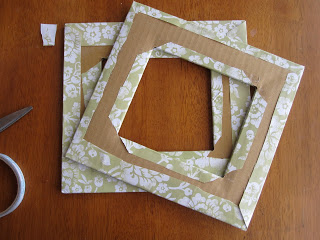
Wrap the outside sections around to the back using the same method as you used for the inside.
Repeat this with both frames.
Step 6
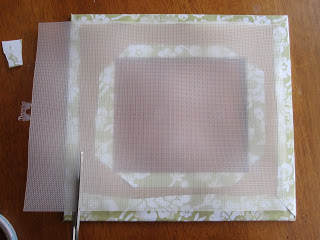
Cut your plastic mesh to the size you need.
Step 7
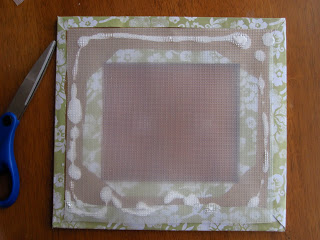
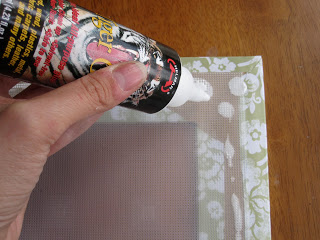
Glue the mesh onto one frame.
Put more glue on the other side of the mesh.
You can never have to much glue with something like this. 

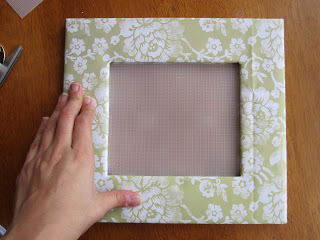
Now stick the second frame on.
Step 8
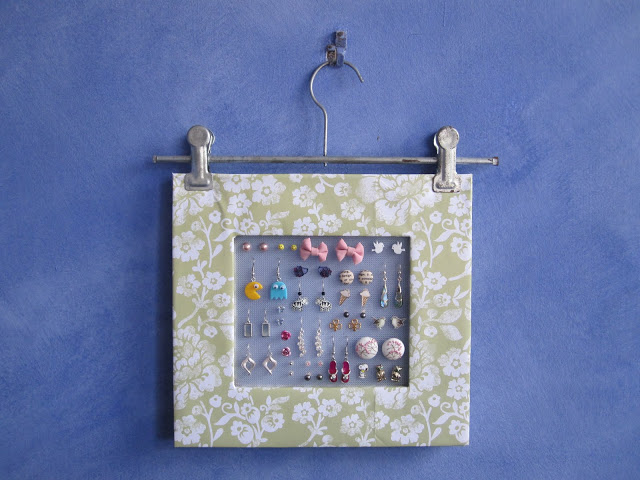
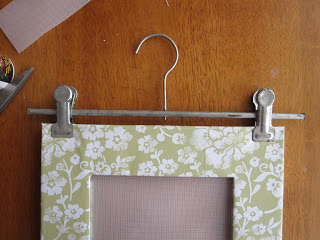
Clip the coat hanger to the top of the frame.
TA DA!
Much better! Now they don’t have to be hidden away in a box when I’m not wearing them. 

What do guys you think?




-16 Comments-
there are several etsy purchases hanging up there. LOVE THEM!
This is an awesome DIY tutorial! Thanks!
so cute,love this idea..keep it up honey ")"
I love it! So cute!!
What an excellent idea! Thanks for sharing <3
I know I'm across the ocean and our stores are different, but where do find that perforated plastic? It kind looks like the plastic you use when doing needle art and embroidery.
Love the idea!!
So simple, but elegant looking. I love it!
Kelly- you are spot on! That's exactly what it is.
cute cute cute !!!
that's so cool! thanks for the idea!
Please share where you got these earrings – I want several of them!
I love how this looks. Is the mesh stuff the kind you use for needlepoint? I want to make something like this because I'm selling Bamboopink Jewelry. I was looking into doing something with chicken wire but this makes more sense.
Thanks for sharing! Katharine
Yea it is exactly the stuff you would use for needle point. They come in different sizes so make sur you get the one with the right size holes for you.
Colette- i just love my collection, and I am constantly building it.
A few of them are from etsy others are from stores in Australia.
I'm glad I spotted the feature article on Craft Gossip! This is such an awesome display tutorial – not just because it looks good but I appreciate the recycling angle! Okay to feature and link in an upcoming post on my blog so others can come visit? Ta!
wow its great…my earing stuff is now going to be manage at one place…thanks dom
it's amazing.. simple and beautiful!