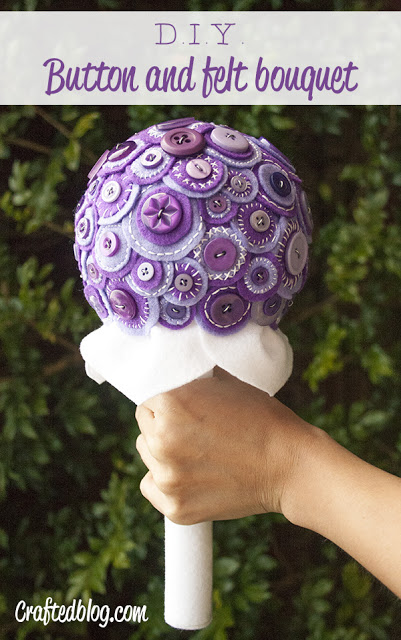
D.I.Y. Button and Felt Bouquet
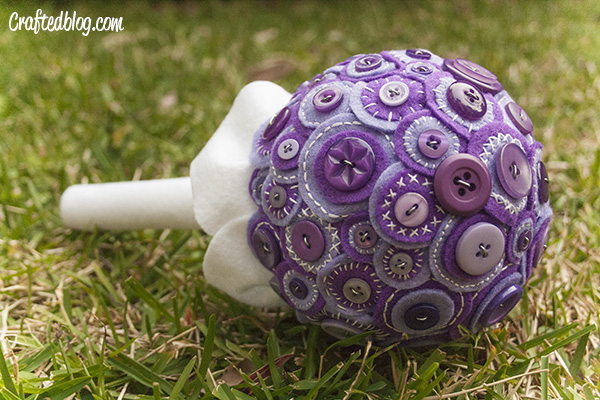
Wow… I am so THRILLED to finally get this project up on the blog. I’ve been waiting so long to show it to you! Why so long? Well to be honest it has taken me FREAKIN’ AGES to finish. If you are thinking about making one for yourself make sure you are willing to spend lots of hours on it. I have no idea how many hours it took me, all together it would be over three days for sure. It’s the kind of project you look at and think, oh yeah I could knock out one of those in a day… WRONG! Well maybe you could if you skip the embroidery part… But don’t let me scare you off! It’s is so rewarding when you finish. 🙂
SHAMELESS PLUG FOR MY ETSY STORE
I will be listing this one in my etsy store at a discounted rate as it was my first one. But as you can see through the process images there has still been a great level of care taken. If you would like one in different colours I would be more than happy to make you one from scratch. 🙂
You will need
Felt (lots!)
Embroidery thread (I used two DMC)
Buttons
Foam ball
Scissors
Needle
Pins
Jewellery pliers (nippers and pointed nose)
Wire (floral wire is great)
UHU All purpose glue (any good glue for felt)
Tiger grip (any glue that won’t eat foam…)
Step 1
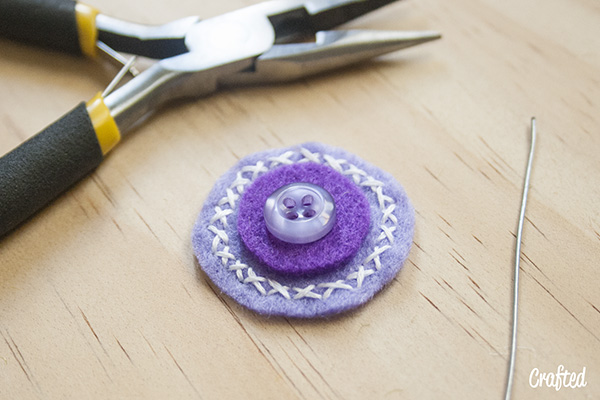
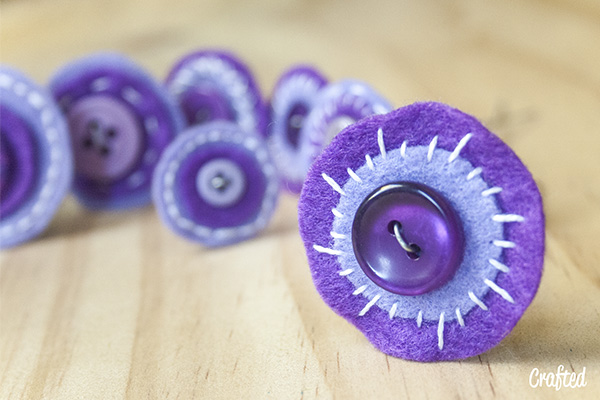
This is where you really give your needle, thread and scissors a workout. Cut out two circles one smaller than the other. Add your embroidery work to the edge. This could join the two circles together or it could just be on the outer circle like the one you see here.
Step 2
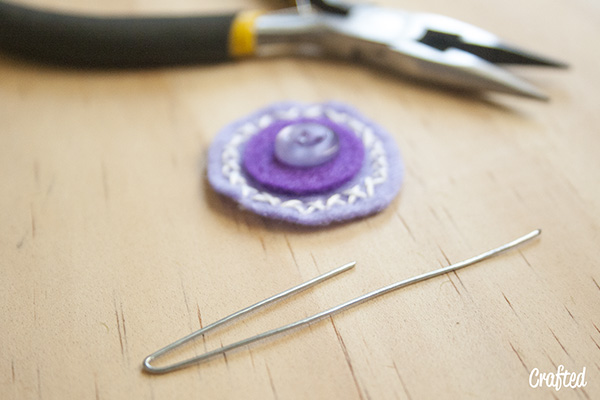
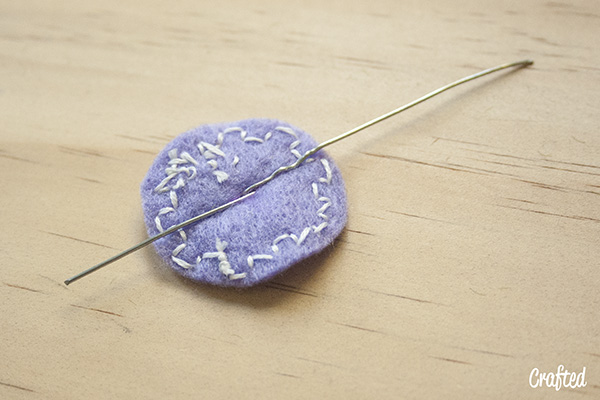
Cut a length of wire about 20cm and bend making a “J” shape.
Step 3
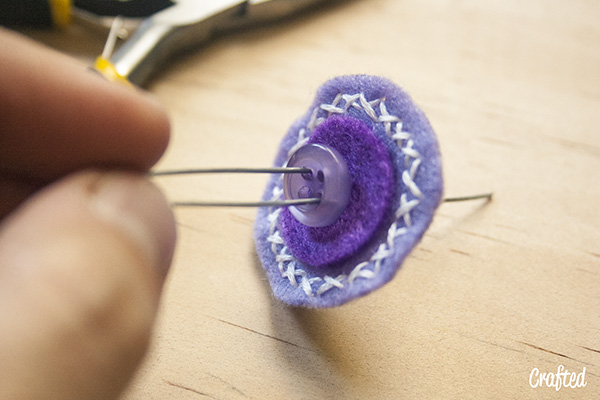
Hold the button in place and attach all pieces by poking the wire through the button holes.
Tip: I found it a bit tricky to push the wire through the felt sometimes. It make this easier I poked holes in the felt first with my needle before adding the wire.
Step 4
Fold the wire flat to the back of the circle (please ignore my ugly stitching… how embarrassing. :P)
Step 5
This is really hard to explain in text but I’ll do my best…
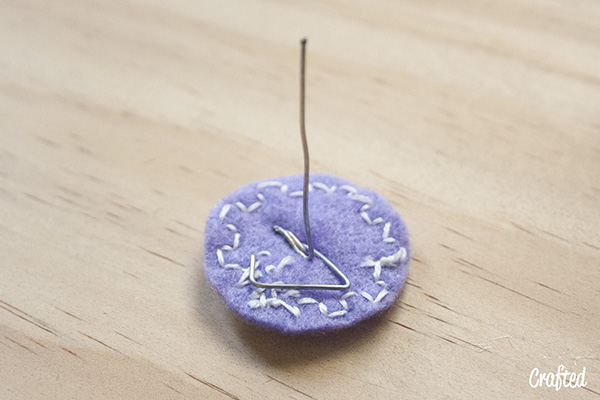
I’ve used the longer piece of wire to strengthen the felt flower and stop the it flopping to far from the button. Bend the shorter piece to stick out like you can see here. This stem with then poke into the foam ball.
Now make a whole BUNCH more! (I used over 70 on mine) The number you’ll need will depend on the size of your foam ball and how large you make the flowers. This is the step that will take the many hours of patience… 😉
Step 6
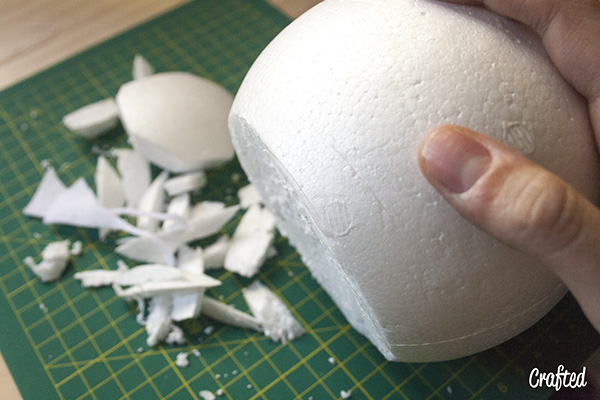
Use your Stanley knife to cut one side from your foam ball. It’s totally up to you how much you cut off. The more you leave on the ball the more round your bouquet will be.
Step 7
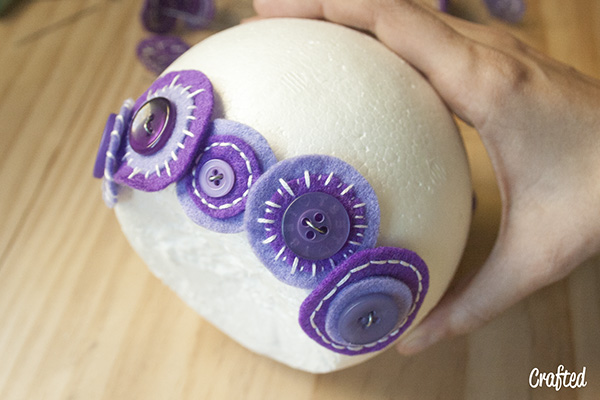
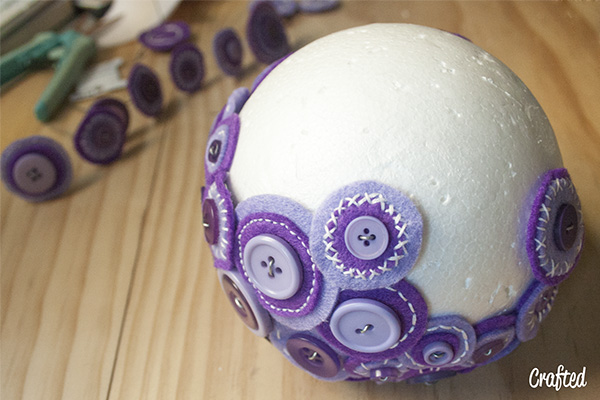
Start poking your flowers into the ball starting from the flat bottom and working your way up.
Keep going… Don’t stress about where you are placing them. You’re not sticking them down with glue or anything so if you change your mind about where you put some you can simply pull them out and start again. You can see from all of the little holes in my ball that I gave it a few goes too. 😉
Step 8
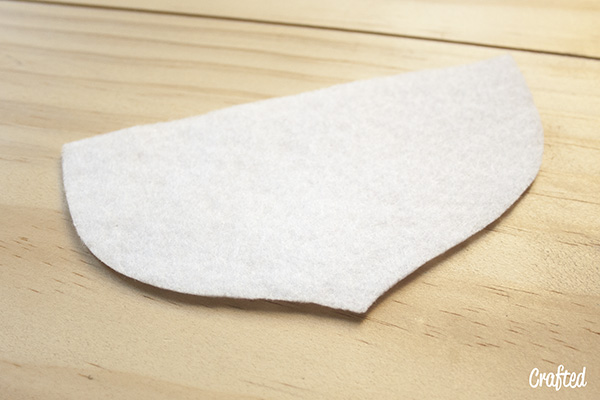
Cut wide leaf shapes from a white sheet of felt. (There are no rules with colour of course, pick any colour you like!) I used 4 to go around my bouquet. Again the number of leaf/petal shapes you need will depend on the size of your ball and how large you want your leaves.
Step 9
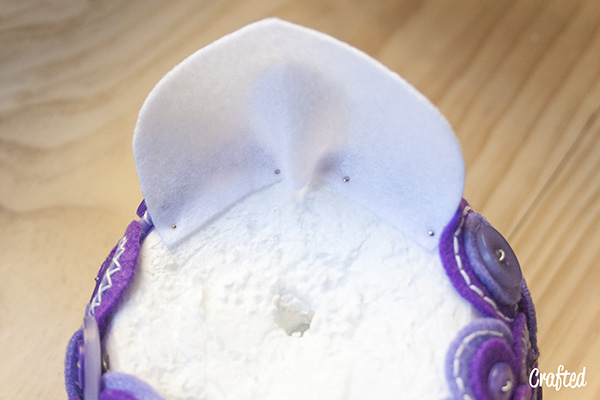
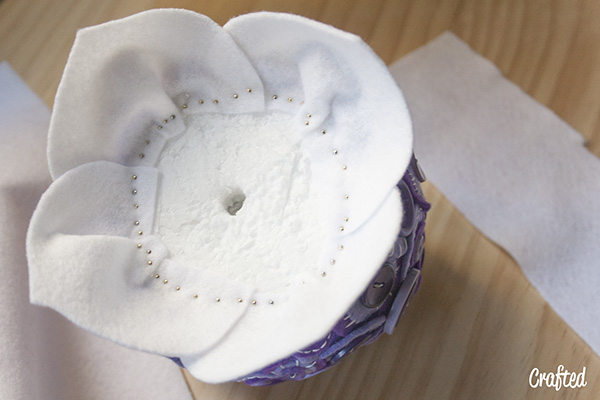
Use pins to attach the leaves to the flat side of the ball. Fold a small kink in the middle. Just makes it look a little more “leaf like”
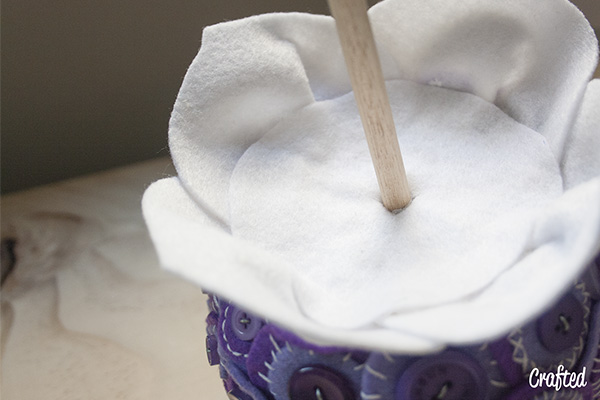
You will also see here I poked a hole with my piece of dowel. You can do this before step 8 or after step 10. Up to you, it just needs to be there for step 11.
Step 10
Use as many pins as you think you need to make sure your leaves are secure. These will be covered in the next step so don’t worry about it looking to messy.
Step 11
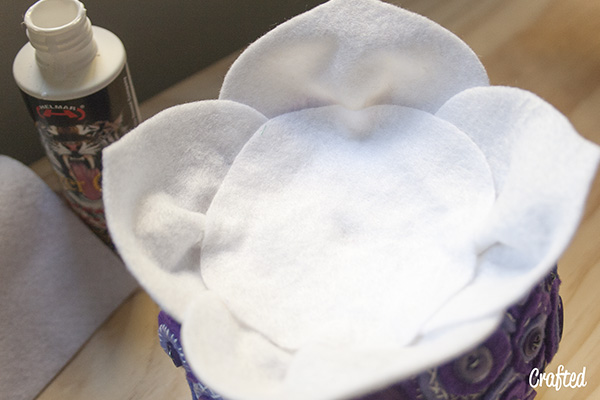
Cut a circle of felt matching the colour of your leaves. Stick this over the base covering all of those ugly pins.
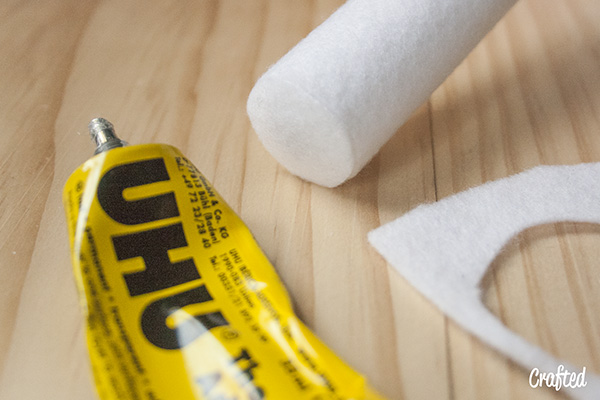
IMPORTANT NOTE: Make sure you use a glue that won’t dissolve the INSIDE of a polystyrene ball. I haven’t worked out what the ingredient is that does it as some water based glues still kill the foam not just solvent based glues. TIGER GRIP (as you can see here) works beautifully. Highly recommended! If you can’t get this glue I suggest you test a few glues on the off cuts of the foam ball. Some glues may work of the coated outside of the ball but not the inside.
Step 12
Use your knife to carefully cut the foam where you made the hole earlier. Use a bit of glue and stick the dowel in.
Step 13
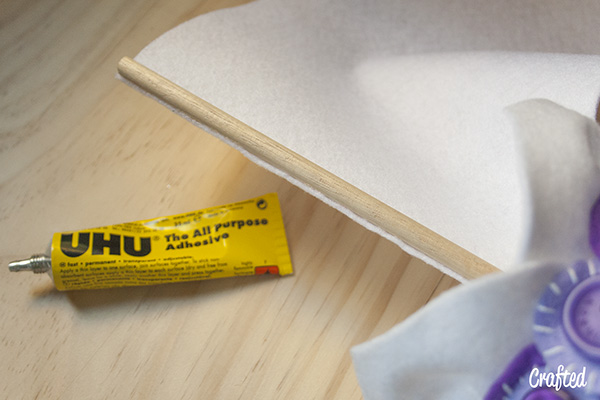
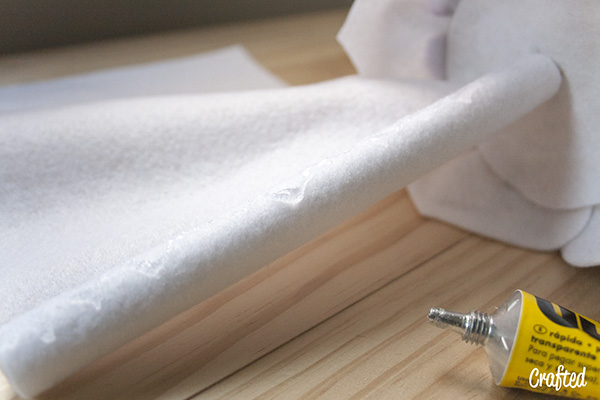
A dowel handel doesn’t really match the rest of the bouquet so I covered this one if felt. Plus it makes it way more comfortable to hold. Glue one end of a sheet of felt to the dowel rod. The sheet needs to be the width of the dowel rod. The longer the felt the fatter the handle will get.
Keep wrapping the felt around the handle until you are happy with the width of it. Use extra glue as you wrap to hold the felt exactly where you want it. (UHU All purpose is AMAZING with felt.)
Step 14 LAST ONE!
Just to finish off the bouquet and give it a more professional finish, cut a circle of felt to the size of the handle base and stick it on. FINISHED!
HUGE project but so rewarding when you finish. 🙂
Have you made something similar?
What have you made for a wedding?



-0 Comment-